Before I start detailing this ridiculous project, I’d like to point out that I fail in the end. There is no great yogurt recipe hidden in here, no surprising technique that changes everything. I tried some methods, some reasonable and some quite stupid, and none of them worked. I just want to make some respectable yogurt at home, and I’m hoping some of you can help.
I thought this would be an easy exercise resulting in containers of beautiful white yogurt in my fridge ready to dip into at any time. But making yogurt is hard. It requires careful watching and measuring, and the results weren’t really worth the effort. Actually, one of the experiments was edible and pleasant, if not particularly exceptional, and the other...well, I’ll get to that later.
The basics of the project that I developed from various sources included warming the milk to 185 degrees Fahrenheit, cooling it down to between 86 degrees and 113 degrees, and then adding the yogurt starter. Let it all ferment for a while, and then you’ll have yogurt. Easy, right?
Using a simple recipe from Farms and Foods of Ohio, I heated a 4 cups of Snowville Creamy's excellent milk up to 185 degrees, and cooled it to 110 degrees.
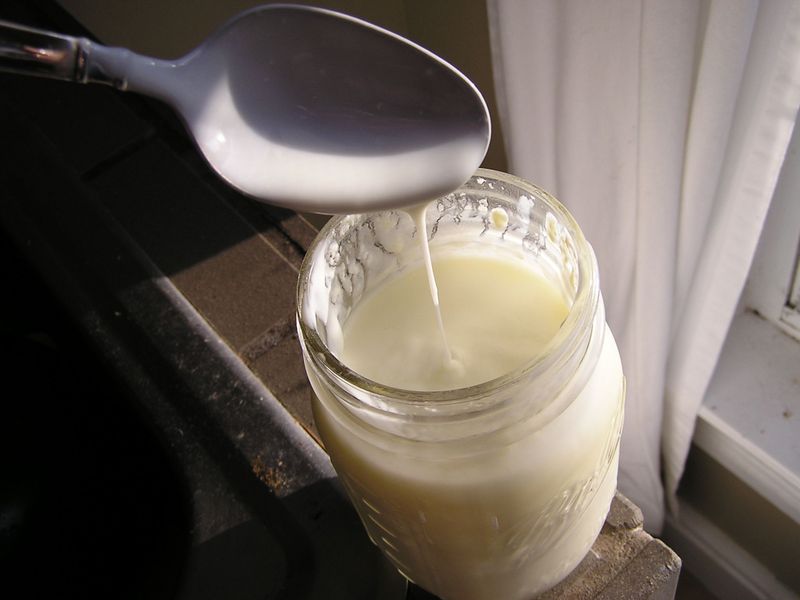
Then I added 3 tablespoons of yogurt--the starter--whisked it together, then poured everything into a clean glass jar, wrapped a towel around it, and set it aside on the counter for 6 hours.
When I opened up the jar I had yogurt. Albeit one with many major flaws.
First off, the yogurt wasn’t firm enough.
My cheesemonger who sold me the yogurt warned me, and even the caption in the Farms and Foods of Ohio stated that the yogurt would be “smooth” and “silky”. And since I used whole milk, eating it felt akin to mixing granola with heavy cream. Instead of feeling healthy and refreshed, I felt fat and slow.
Also, the yogurt didn’t have much tang.
Perhaps the most distinctive attribute of yogurt is that wonderful tang which marries so well with fruit and granola. The yogurt I used as a starter had such a great flavor, but none of that really translated into my version. The faintest hint was present, but it paled in comparison to the starter. It felt like I had just diluted the little yogurt I started with with lots of milk.
It wasn’t a complete failure. I haven’t thrown it away, and it’s doing an amiable job for breakfast, but I probably won’t make it again because I can buy relatively cheap tubs of excellent yogurt at the store.
If I was going to try make yogurt I again I wanted something outlandish that could hopefully solve these problems. In Harold McGee’s On Food and Cooking he gives some guidelines for how industrial yogurt is made and I figured I could pick up some good tips. It contains the same outline as the above recipe, but it just takes things a little further. Instead of just bringing the milk to 185 degrees, and then turning the heat off, the temperature stays at 185 for 30 minutes. After that it, just like the previous recipe, it cools things down. But instead of 110 degrees, McGee opts for 86 degrees. Oh, and it has to stay there for 18 hours!
His reasons seem important:
Rapid gelling produces a relatively coarse protein network whose few thick strands give it firmness but also readily leak why: slow gelling produces a finer, more delicate, more intricately branched network whose individual strands are weaker but whose smaller pores are better at retaining the whey.
How, exactly I would maintain that temperature was beyond me. But that didn’t stop from bringing a batch of milk to 185, cooking it for 30 minutes, and then cooling it down to 86 (or there about). Then and only then, did I think about how I could get this done. I realized early on that sitting a pot on a burner over low heat just wouldn’t work. I had to get more creative.
First try: a griddle set to low, with a pot stuck on top. But that had too much heat.
Second try: I diffused it with an iron skillet. But still, too warm. I even added a little water to the iron skillet. Not good enough.
Third try: I busted out my faithful slow cooker and turned the heat to “stay warm”. Then I dumped the yogurt into a ceramic bowl, and stuck it in. That was still too high, so I added ice cubes to cool down the pot. This kind of worked until the ice melted. Then I’d have to add more. But I was able to keep the temperature close to 86 degrees as long as I checked it regularly.
Did I mention this lasted for 18 hours? I checked this thing constantly, trying to maintain some kind of consistency. But it was fleeting. And when the marathon session was over, what came out looked exactly like cottage cheese, albeit some that looked disgusting, yellow, and potentially dangerous. I threw it out.
I don't doubt that McGee is right, but just not for me. He was talking about how things are done on high tech equipment, not slow cookers diffused with ice cubes. And because I didn't cover it, all kinds of dangerous bacteria could have landed on it and done bad things.
So the question begs, without fancy, devoted equipment, can good yogurt be made at home?


{ 42 comments… read them below or add one }
Was your starter yoghurt one that was made with live cultures? Some of the supermarkety sorts don't specify so maybe it didn't actually do its work as a starter?
I've never actually made yoghurt on my own but I've been wanting to try and I remember reading online that some people add in a bit of instant milk powder to make it thicker – so that could help with your consistency, and you could probably just use skim milk if you want it lighter, but i'm not sure about the lack-of-tang/flavour.
I'll see if I can give it a try one of these days and will let you know how my experiment goes.
This may be "fancy, devoted equipment," but a PID controller (available here and here) is pretty cheap and can be used with your slow cooker. As a bonus, it probably would do a better job at cooking the hard-boiled eggs from a few posts ago than the slow cooker alone.
I put a few inches of my hottest tap water into an ice chest, then a platform to rise above the water. The yogurt goes on top of the platform for 8 or 10 hours. Works great for me.
I've had great success using lowfat milk with extra nonfat powdered milk added to it for thickness; using a couple of tablespoons of Greek yogurt for the starter; and putting the jars in a small picnic cooler with an ordinary heating pad set on "low." I leave it there all night and in the morning I've got nice thick yogurt! The first time I did this, I used an instant-read thermometer to keep an eye on the temperature inside the cooler to make sure it was in the right range.
I had an informal yogurt-making seminar with Ali at Astoria's Kebab Cafe a couple of years ago; all he does after he's heated the milk is stick the pot on a shelf above his stove for a day. He then strains his to get a very thick final product.
Good luck!
litza: That's really interesting. I didn't even think about staining. I guess this means that I'm going to have to try again.
I've had success going off the recipe in my 1960s era Joy of Cooking. I pour the warmed (scalded? can't remember) milk into my big mason jar with the 3 T. of yogurt and whisk them together (last time I used Stoneyfield Farm brand lowfat plain yogurt and 2% milk). I then wrap the jar in two kitchen towels and wrap the bundle in a plastic garbage bag. This worked great the first time I did it and took about 8 hours or so for the yogurt to gel. It never got as firm as some supermarket yogurts, but that was because I put it in the fridge after 8 hours so it wouldn't get too tart. It was definitely more firm than heavy cream, though, so this might work for you.
I've also heard that you can create the warm environment using a heating pad placed under the jars, perhaps with something in between so the heat source isn't directly against the glass…
The longer you let the yogurt incubate the tangy-er and firmer it will get. I use a yogurt maker (not very expensive) and incubate for at least 12 hours, sometimes up to 20. I also don't bother with heating the milk before adding the starter, but I do bring all ingredients up to room temperature before incubating.
Have heard on top of the fridge also works, as well as in a gas oven that's turned off.
You can buy a yogurt strainer or just use cheese cloth. I often do this with store bought yogurt to get a very thick consistency for when I make Lebanese foods.
My Armenian grandma used to make yogurt all the time…we put it in a small closet for about a day after making it and the closet was pretty warm…so maybe a warm, small space?
This site: http://fiascofarm.com/dairy/yogurt.htm has some good info. I've had very good luck with adding powdered milk, and using the heating pad in a cooler method (keeping it ~105F-115F). Mind you, I've had even better luck w/ the $30 yogurt maker I bought.
Love the title of this post and I love a person that can admit a mistake! Thank you for sharing with us and walking us through.
My husband and I have been making our own yogurt about once a month for a while. We just bring the milk up to 203, then let it cool to just above 108. Pour into sterilized mason jars, and add starter–about 1T yogurt from a previous batch per 1C warm milk–to each jar when its temperature falls all the way to 108 (it will lose a few degrees while you're pouring it).
Line an ice chest with a towel or blanket, put the jars inside, and wrap them up with more towels or blankets if necessary to fill up the ice chest.
I think since we make it a gallon or two at a time, the jars themselves help keep each other warm for a while, letting the cultures eat and screw and whatever else they do in the milk for longer. If you're making a smaller quantity you might want to put a heating pad under the ice chest or something; I'm not sure. If four quarts of yogurt seems like a lot, remember that you can drain some of it to make cheese, give some away, make some Indian food, rub some on your mom's dog's rash–whatever floats your boat.
Leave everything sealed up and forget about it until the next morning. You should end up with nice, firm yogurt that is sweet at first and gets tangier the longer you keep it in the fridge.
Once we tried just bringing it up to 108 and adding starter, but ended up with runny yogurt, so now we always bring it up to 203 first. Every other time has been a complete success, so the high temperature must do something to make the proteins more easily digested or . . . something.
Good luck!
My Ukrainian family has two ways of maintaining heat on yogurt as it brews:
1) Heating pad on low inside an ice chest filled with pre-warmed blankets (toss them in the dryer). It should maintain steady at around 100 degrees.
2) Leave the yogurt in the oven with the light on. That's it.
The longer it brews, the tangier and thicker it gets. Straining, as mentioned above, is also very effective.
Also consider that industrially produced yogurt does not make a good starter. The best starters are ones you grow yourself. You can buy yogurt starter probiotics online (google "yogurt starter"), but even then, go through 1-2 cycles of yogurt and reserve a bit of the results as your starter, similar to maintaining a mother for sourdough. The third to fourth generation is usually stronger and adapted to your environment and methods.
I think you are on the right track with the slow-cooker… I tried this method myself recently with good results. I raised my jar off the bottom of the slow-cooker to keep it from overheating and also only partially filled the slow-cooker with water. My yogurt was in an earthernware jar… filled with 1 litre of milk, and surrounded by about a litre of water in the slow-cooker. Let it go for 10 hours at least…
We've been making our own yogurt for the last year. The key is buying a good thermos. Heat the milk up, (no need to keep it at this temperature for any length of time) then cool it back down, add the culture and put it in the thermos. Close it up tight, and leave it over night. This method has consistently produced yogurt that is as good or better than the best stuff I've ever gotten at a store. One note though: I had a friend who had some problems making yogurt with non-homogenized milk. Once she switched to homogenized, it came out great. Other than this, I can't stress how consistently this method produces a great result. Email me if anyone needs any more details.
Just found your site and I love it!
My GF gave me a yogurt maker and I've had mixed results…the recipe that came with it said to use non-fat milk powder but I ended up with yogurt that is more like wall paper paste, tastes okay but so stringy.
Many trial and errors later I have found that the best results have been with raw milk, no non-fat powder and remember to stir in the starter verrrry gently.
Good luck!
Thanks everyone for your yogurt support. I can't wait to try this again.
Hey Blake…I met you today at Blue Ledge Farm! I'm the intern. I love your blog! I wanted to give you the link to my blog…it's about my experience working on the farm, and the food I am eating while I'm here. Check it out if you're not too busy!
http://lisa-blahg.blogspot.com/
Please do post again when you perfect your yogurt-making technique! I've never managed it, so I'll be interested to see how it works out for you.
btw, did i ever mention that i love your site….i used to go under another name…but i love and follow most of your recipes….however going back a few posts we disagree on poutines…je t'aime ya anyway
I agree with..if u factor in the hours spent at what u would be earning or charging, with the cost of the ruined ingredients and the gas to buy them, you are probably better the next time with a yogurt-maker…
Hrm. Interesting. So far I've not had a problem with yogurt–the first batch I did I just heated the milk up to simmering–small bubbles around the rim. [My understanding is that's all that's required to re-pasturize the milk]
Let it cool til I could hold my finger in it for 15-20 seconds comfortably, pitched the warm milk into jars along with some live yogurt, and placed them in a cooler full of quite hot water [tap water, not boiled] so they would be warm enough to let the culture grow happily and not too hot that'd it kill it off.
Half of it I took out after 8-10 hours when it was still runny as my partner prefers drinkable yogurt, and the rest I kept in overnight [the water cools, naturally, so it will need more time] to get a firmer, more tangy product.
The 2nd go was a week ago when things were disgustingly hot and I just left them on the kitchen counter in the sunlight from the window for 8-14 hours.
I've found the results to be great for eating or using in recipes. Making yogurt cheese [straining yogurt through a cheesecloth/bag hanging (the whey can be used in cooking as stock or to start a new yogurt batch) over a container to catch the whey] is also a fun thing I've toyed with…
Look at 101cookbooks.com and search for yogurt. Heidi and Co. has a recipe that I use all the time. I use a yogurt maker to maintain the temperature (at $15, it's already made back it's money) and I use the microwave to heat up milk as the results are always consistent. Strain your yogurt for thicker results too. Good luck!
Hailing from Australia here! I have used the same method as many other people here, for years:
Heat your wideneck thermos with hot tap water for 5 mins while you deal with the milk. Heat the milk (say 500ml) to simmering/almost-simmering and then let cool to just hand-hot. Mix in 3 teaspoons of live-culture bought yoghurt, pour into pre-warmed thermos and put on shelf for 6-8 hours. Don't move it around as this can disturb the curd. When it sets (check on it), put it in a container and refridgerate. I have tried adding flavourings at this stage, but beware that some jams for instance will make your yoghurt go totally runny! Now I just add flavourings to my cereal bowl at breakfast!
I have done the following just as following:
make yoghurt quark (quark is a German soft cheese) by straining your yoghurt through a fine cheescloth. Put a bowl underneath to catch the whey and add it later to bread, or give it to your potplants or chooks (or drink it, you know you want to). When it stops dripping you should have yoghurt quark in the cheesecloth. This is yummy spread on toast with apricot jam! You can eat it in any way you like, it's just like a soft cheese. You can alter how thick it is by how long you let it drip.
Hope this works for somebody! Two of my friends started doing this too and it works great for all of us! And I don't have a thermometer
Hello Nick,
I think you’ve scared me off of making my own yoghurt (yours turned out how I think mine would), but there’s something easier and equally fun which I though you might be able to help me with.
I’d like to make some frozen yoghurt. Not just yoghurt frozen, but something really tasty. I’m keen to just use maple syrup, honey or fruit for sweetener and not too much.
The goal is to cut down on my sugar intake via the (excellent) Vienna ice but to continue to have cool treats for this summer after a hard cycle…
Perhaps you could do a separate post on the best way to make frozen yoghurt, starting from high quality yoghurt either bought or home made.
I read with interest your assessment of the yogurt situation — as I have too, failed MIZerably at making yogurt — and it was only my first attempt, this weekend.
I followed Alton Brown’s recipe (from http://www.foodtv.com) using his “surefire” method of heating to 120 degrees, cooling to 115, adding the yogurt to the warmed milk (in fact, I used whole milk, organic, to the tune of $6.50 for the half gallon) and my yogurt was more yo, and less gurt.
Lots of stringy slime after a night in the oven (wrapped in blankets with the heating pad) and refrigerated for 8 hours. I’ll use it — but it’s not yogurt.
I’ll try once again, with 2% next time — and see what happens. I’m upset, because I’m an accomplished cook — and why should any of us be stymied by some ridiculous microorganisms!
Ellen, NYC
5.18.09
I made two batches and the end product looked stringy not eatible.
I’ve been making yogurt for about 3 months now with excellent results. I’ve had a couple of less than successful batches but have got it down pretty consistently now.
My first batch I made with whole milk just to make sure I knew what I was doing and then moved on to 1%. The point of heating the milk to 185* is to kill off any bacteria that will kill the yogurt bacteria later on. This is usually unnecessary because most store built milk has already been through this process.
I cool 3 cups of 1% to 105*, add a couple of spoonfuls of Stonyfield lowfat yogurt – live culture is key – mix it up well and covered with plastic wrap. I then wrap it in a heating pad set to high, tie it up with a dish-towel, place it on a dish towel and plug the top with a towel. So basically, I create an incubated “womb” so the yogurt can do it’s thing. Let it sit for 6 hours then place it in the fridge to chill. Should be ready in about an hour. Remember to save some as a starter for your next batch.
Sometimes low fat milks make it more difficult for the yogurt to set, so I put the starter yogurt in the jar and sprinkle a small amount of plain gelatin over it (about 1/4 tsp) and mix it up well before adding the milk.
I hope I have offered some helpful pointers.
I have to admit that my experience comes from making homemade ginger ale, and not homemade yogurt at all.. I have tried multiple times to make the necessary “cozy-warm” environment needed.
In summer: the greenhouse effect. a glass, or other clear (plastic cling wrap, even) tent over the {in my case, yeast} in a sunny window. Rating: okay, not great
In winter: insulating blanket around the jar resting on or near heat source. Rating: fantastic… as long as it is January in wisconsin.
Seasonless idea: think easy-bake oven- placing my jar right near a 40watt light bulb. rating: pretty useful. don’t get too close or too far, trial and error may be necessary. also may use insulated blanket idea…
Another year-round attempt: oven, preheated, now off. Since i needed to grow my yeast for 24 hours, I preheated to the lowest setting, but made sure i could reach in and still comfortably touch everything… only took about 4 minutes. every three hours or so i turned it back on for a few minutes. i wasn’t attempting an extremely precise temperature, so you may need to monitor yours more closely than i did.
Good luck! Yogurt is next on my DIY list…
Hello to all! Excellent blog!!
I recommend this website…
YOGURT MAKING ILLUSTRATED
http://biology.clc.uc.edu/Fankhauser/Cheese/yogurt_making/YOGURT2000.htm
for ayone who is making yogurt for the first time. It is excellent and includes photo illustrations for all steps in the process.
Once you have master the basics using this method then you can experiment and use other methods for incubating the yogurt etc. I still believe that investing in a good quality yogurt maker takes the guess work away. I must alert you though … most electric yogurt makers tend to run on high temperature and the final yogurt tends to be more sour. The EU countries have a huge variety of great yogurt makers – the best are manufactured in France, Belgium and Germany.
The “ferrari” of yogurt makers is one made by TOSHIBA but unfortunately it is only available in Asia/Japan. I am dying to get hold of one but no luck so far. This is the only yogurt maker I have seen that allows you to modify the incubation temp. All other electric makers have a preset temp.
TOSHIBA NATURIA TYM-1000 yoghurt maker.
http://planetlactose.blogspot.com/2007/03/ferrari-of-yogurt-makers.html
I made my yogurt that way ( you may make smaller size by deduct half ingredient), MAKE SURE EVERYTHING IS CLEAN, e.g. bowl, spoon, thermometer, measure cup,etc :
(1) have a five liters bowl (not plastic, it should be microwavable, IKEA is available that size.)
(2) pour 4 Liters milk (skim or 2% or homomilk) to the 5 liters bowl
(3) put the whole bowl into microwave for 15 minutes ( SET HIGH)
(5) take it out from microwave and stir it 30 seconds
(6) *option* if you want to make favour yogurt, just put 20 tablespoon sugar, 4 tablespoon vanilla, 2 cups powdered dry milk (if you want thicker yogurt, just put powdered dry milk, otherwise, just ignore it) and stir it until everything resolved!!
(7) put the bowl back to microwave for another 15 minutes (SET HIGH)
(8) use a non-slippy thick glove to take the HOT MILK out and the temperture of hot milk should be around 175 to 180 F
(9) cool it down to 110 F ( for fast cooling down process, just soak the bowl into cold water until temperture drop to 110F )
(11) preheat your oven to 110 F ( use thermometer to determine it because most oven minimum 170F to start preheatting , turn off oven when it reached 110 F and then turn on the oven light to keep that temperture. If it is too hot, open the oven door until it is around 110 F )
(10) when your milk temperture drop to 110 F, put 1 cup plain yogurt ( I usually pick Probiotic Yogurt) and make sure all yogurt resolved in milk.
(11) put the whole bowl to oven for minimum 5 hours and avoid moving it.
(12) temperture should be between 100F to 110F, open the oven door if it is over 110F OR turn on oven for a 45 second to 1 minute if oven drop below 100 F
(13) after 5 hours, take it out and put it in the fridge directly and you will have a wonderful vanilla yogurt ready next day!!!
NOTE :
(1) I make 4 liters because I don’t need to make that often and it can last up to 10 to 12 days for whole family to consume.
(2) You can buy a smaller bowl like 3 liters and make 2 liters yogurt, just deduct all ingredient to half to make smaller bowl.
(3) You may leave seperated 1 cup milk to a clean cup to make a seperate 1 cup yogurt starter for your next yogurt making.
ENJOY
I use a foolproof recipe for making yogurt. . .it involves a half gallon of milk, 1/2 cup of store bought plain yogurt and. . . .a crockpot. It’s foolproof and I’ve never had bad results.
http://crockpot365.blogspot.com/2008/10/you-can-make-yogurt-in-your-crockpot.html
I’ve made yogurt for years–and to be frank I often scoff at some of the recipes I see because they’re incredibly detailed, and my method is …not so much!
Hope this helps anyone wanting to try.
Equipment:
~Crockpot (with a high and low setting)
~Milk (1% is what I use–but more fat is fine)
~Skim Milk Powder (thickens–also adds protein)
~Starter: either active culture organic plain yogurt or store bought live culture starter
~Cheesecloth, Strainer, Bowl
Steps:
-8 Cups milk into crockpot. Cover with lid. Set to low. Leave for 2.5-3 hrs.
-Turn off crockpot. Add approx 1/3 Cup of skim milk powder to milk and whisk well to dissolve powder.
-Leave lid on crockpot. Allow to stand and cool approx 3 hrs. You need the milk to be warm-ish–similar to the temp you’d use if warming a baby bottle of milk or formula.
-After 3 hrs, incorporate 1/2 Cup of starter yogurt/culture and stir to combine well.
-Place crockpot in oven for 8 hrs. You don’t need alot of heat–any ofr that matter–but I do leave the oven light on; and if your oven is gas, the pilot light on is fine too. You’ll know it’s done when it’s the consistency of a custard.
-Transfer yogurt to cheesecloth laiden strainer and suspend over a bowl for 2 hrs.
Notes:
~Skim milk additive is a preference. I simply find the final product to have better consistency when I use it. I also like the additional protein offered with the skim milk.
~Straining is also a preference. We like thick and rich yogurt. Also, some of the harsh “twang” is lessened when I strain as it removes the bitter lactose..which is in the whey. Don’t be alarmed if you strain–you WILL see a loss in yield of about 30% total and the liquid will be a greenish yellow.
~Leaving the yogurt in the oven longer DOES produce a slightly tart-er final product, but if you leave it too long, it will start to separate. Don’t fret if that happens–your yogurt is still perfectly fine..just strain it.
Voila!
Enjoy!
I’ve been making yogurt & kefir at home for years with out problem & I agree with Harrisgurl . . . simple is better. Here’s what I do plus a few tips at the end.
1) pre-heat a small picnic cooler with hot tap water (fill with H2O, cover & put to the side)
2) place 1/2 gal of organic milk (yes, regular works too but what’s the point; if your going to make it yourself, make it the best you can) in a pyrex bowl, cover with a glass lid or plate & microwave (8 minute in mine) to 120 degrees F . Anything between 120F and 108F works but cooler tends to yield a thinner product. (if you don’t have a cheese thermometer, any thermometer that goes to 120F works)
3) gently stir in 1/2 cup plain yogurt.
4)Laddle/pour into clean, wide mouth glass jars of the same height; wipe rim; close lid snuggly.
5)Pour the pre-heating H2O out of the cooler. Place sealed jars in cooler and re-fill picnic cooler with fresh, hot tap water stopping about a half inch below the lid to the jars. Put lid on cooler and set it someplace where its at room temp over night.
6) In the morning, put jars in the refigerator. Its that simple.
If you’re going to flavor your yogurt, be sure to save a half cup of the unadulterated stuff for your next batch first.
TIPs: Your starter yogurt makes all the difference in the world. Most of your supermarket yogurts make a mediocre home yogurt, they tend to have too many fillers, too few live cultures and make an overly sour home yogurt. Go to a middle eastern, indian, eastern euroean market or similar market & by a good, plain yogurt.
That said, most of these have a bit of gelatin for thickeners also, so you’re homemade will likely be a bit thinner than what you started with; end of story. If you want thick, strain off the whey (I use a coffee filter in a strainer overa a bowl) in the fridge for a few hours & use whey for something else.
Your homemade starter will keep refrigerated for a couple of weeks, after that it looses some quality. Also, if after you’ve made several batches from the starter you’ve saved, you notice its lost some of its “charm”, just go buy some more of your plain commercial yogurt & start over.
To make kefir, use the store bought plain variety of your choice, the brands the supermarkets carry tend to be just fine for this. Use the same ratio of milk to starter (i.e. 1/2 gallon milk with 1/2 cup starter; 1 quart milk to 1/4 cup starter, etc). Follow the instructions given for yogurt. The only difference is, it takes a shorter length of time to thicken – six hours will likely do it.
Hi Nick,
Thanks for your information about yogurt starter, I would like to share with you my blog about yogurt starter. I hope you can visit later.
Cheers!
The Yogurt Starter
Since my last post a few weeks ago, I’ve done some additional research & refined my technique. I’m happy to report that I now get lovely, thick yogurt with just the right amount of tang everytime & use no fillers! After reading up on the chemistry of milk, cheese & yogurt I found that to get thick yogurt you MUST heat the milk to 185 degrees F and hold at that for a minimum of 15 minutes (medium to medium low heat once its to temperature). I do this on the stove top and stir it periodically to keep it from sticking to the pan. You then let the milk cool naturally to 115 degrees F & add your starter. Alternatively, you could keep you milk heated at 185 degrees for about a half hour & chill it in a cool water bath to 115 degrees. I do the former becasue I don’t like to babysit the milk while its on the burner any longer than I have to. Other than these few specific changes, I continue to follow my picnic cool/warm water bath method I detailed previously.
I had always thought the reason one heated the milk to just below boiling is to sterilize it. It turns out there’s more to it than that! At 185 -190 degrees F, the milk proteins begin to change their molecular bonds. After the period of time noted at the higher temperature, the bonds on the milk protiens have changed in a manner that enables the desireable bacteria used in yogurt to convert the milk into that nice thick delicious mass we so love. If during the incubation period the milk/yogrut starter is kept between 108 & 114 degrees, the correct population balance of the various bacterias in the yogurt is achieved to get just the right tang. Lower incubation temperatures will result in a blander, less tangy yogurt, higher incubation temps will give you a much more sharp (sour?) tang because you have shifted the concentration of the bacterial populations! The yogurt should be ready in about 12 hours.
As to kifer, the bacteria in this prefers a cool temperature and needs longer to incubate. So here are the changes to that pervious set of directions I gave that result in a very nice kifer: heat milk to 68 degrees F, pitch starter & keep container in the dark and at 68degrees for 24 hours while it ferments. After that its ready, so keep it in the fridge. That’s it! You don’t need to heat your fresh pasturized milk to just below boiling for this one, there’s no need to change the protien bonds to make kifer happy!
I happened on your blog trying to figure out what just went wrong with my yogurt.
But here’s what I know so far:
Two weeks ago, I got some local raw milk, heated to 167 degrees, cooled to 90-ish, then mixed in Yogourmet starter culture. I stuck the thing in my dehydrator at 110 degrees for about 8 hours. What came out had some lumps in it, but otherwise was thick and very yogurt-y. My son loved it. I put it in smoothies and loved it there.
Today, I used Snowville Creamery’s milk (pasteurized) and I heated it to only 110 degrees then mixed in the culture and stuck it in the dehydrator (someone else I “know” through blogs said she only heats her milk to 90 – 110 and it works just fine). Disaster! It has thick curds that look sort of like yogurt floating in a yellowish whey. Ugh. Umm…sounds like it’s what that guy said happens if it cultures too quickly. Should be technically edible, I guess, but…sigh. I was so looking forward to REAL yogurt in my smoothies tomorrow.
I’d recommend trying again with raw milk, if you can get some. You can heat to 180 to kill off everything if you’re worried about it, then cool down to 80 – 90 degrees, add culture, and put it somewhere where it will stay at a constant temp. for 4 – 8 hours. The first time I left it 8 hours. It wasn’t perfect, but plenty tart and pretty darn good, and I felt just fabulous after eating it. And it really was easy. Oh, that time I also took forever to heat the milk on low, like an hour. That might have had something to do with it too. Good luck!
Hmm interesting little problems
-If you add skim milk powder–make sure you whisk it in well. This should be done immediately following the initial “cooking phase”. If you don’t mix it in, you’ll have lumps for sure!
-When you mix in your culture (I most often use an organic store bought active cultured plain yogurt), do it gently..no whisk. But make sure it’s really well incorporated–ie no lumps. And when you add it, make sure it’s room temp.
-I’ve found that if I leave the yogurt “setting” for more than about 12 hrs, it starts to separate ever so slightly–leaving that greenish liquid, which is the whey btw. You can EASILY rid yourself of this by leaving the yogurt to strain over a cheesecloth for 2hrs in the fridge. Any more than two hrs and it becomes really thick–and if you leave it in a cheesecloth overnight, it will be somewhat like cream cheese, so keep an eye on it.
-Lumps can usually be whisked out..but if you’re whisking in your skim milk powder, adding culture slowly and letting yogurt set for almost exactly 12 hrs, you’ll likely not find lumps. I find that even at the 10 hr mark, my yogurt is set as nice as a custard.
If you haven’t already tried, and you have a crockpot-I HIGHLY recommend my recipe above. Forget the thermometer and all the precision. It’s easy peasy and works EVERY SINGLE TIME.
Happy eating
For anyone reading this now, I need to point out that you’re trying too hard. And that’s why you failed. =P
I tried hard my first attempt at making yogurt, too. All the measuring and temp checking and blahdy blah. Then I spoke with someone who makes yogurt every week. Her instructions sounded too simple: “Heat the milk in a pot until it froths/boils. Then let it sit until you can comfortably stick your finger in it & leave it there — about an hour. Then, mix some of the warm milk with a few tbs of starter yogurt & add the mixture to the rest of the milk. Cover with a towel & set it in a dark warmish place over night.” I set the container on my heating pad turned on the lowest setting & covered it with a bath towel to incubate.
Voila! Perfect yogurt. I then strained it through a triple layer of cheesecloth to make greek style yogurt and it was absolutely amazing.
So, stop measuring and fussing over the incubation temp & you’ll do just fine.
I used the method described above yesterday -not trying too hard! It was in the airing cupboard overnight and it didn’t really work. 24 hours later I had warmish, runny milk.
So this morning I put it in the oven with the temperature off, turning it on extra low for a few mins every hour or so, and it has started to thicken, but I’m a bit worried it will go off before it has a chance to set properly.
I’m debating whether to pack it in and turn it into curd cheese to make blueberry cheesecake. Could be worse I guess!
adding dry milk isn’t very healthy though because of the properties it has.
Part of your problem is that you are expecting your yogurt to be thick like pudding. You might as well stick to the store bought type if that is the case. Homemade,”real” yogurt is not thick. It will run off of your spoon. The commercial yogurts have dried milk and often gelatin in them to thicken them up. I am skeptical about dried milk just because it has some negatives that makes me not want to use it. A tad bit of gelatin in your yogurt after it is set will thicken it up for you though without really any adverse issues. I would keep a fresh start out without the gelatin though before you add it. The idea here is a good, “REAL” FOOD without a bunch of additives! You will get used to the consistency. I have found that heating the milk to 80 degrees and keeping it in the microwave overnight makes the best results. Also I keep a tight cover on it, and I use more starter than most recipes call for. Sometimes it is runnier than others , but I just deal with it. I think making it with whole milk every few batches thickens it up also.