
Focaccia, the Easiest Homemade Bread
The best bread to make for those that don't like to make bread.
If bread making scares you like it scares me, but the lure of authenticity is irresistible, then focaccia may be the place to begin.
The intoxicating smell of yeast; the wet stickiness between your fingers; the magical billowing quality of the dough when a warm spot trns it into a living thing. These are the pleasures of bread making. And these are the pleasures I am almost wholly unfamiliar with. Until now.
See, I've never bothered much to make bread in the past, probably because most of my cooking life was spent living in Brooklyn, where world-class crusty boules and baguettes and ciabattas were never more than a couple subway stops--or a short walk--away. It was hard to figure out why I should bother.
Elin and I lived for a year in the Carroll Gardens section of Brooklyn, historically a very Italian neighborhood, and our path home from the subway weaving through the gorgeous brownstones was always carefully engineered so that we would pass by Mazzola , an Italian bakery that's been around for ages. If it was open, we'd pop in for a "lard bread," which was a chewy, dense loaf studded with chunks of porky salami. Or perhaps we were in the mood for just a crusty baguette to have next to that night's soup.
Nick lived nearby as well, and when we went out drinking on Smith street or our local watering hole B61, we would regularly go out of our way to walk by the metal grated side-door of Mazzola Bakery, where you could stand peacefully and smell bread baking all night long. Rumor was that you could bang on the metal door and the bakers would slip you a roll or an extra loaf for half price or even free.
Sure, I jumped on the no-knead bread bandwagon like every other blogger, taking it as an opportunity to also make my own butter. But as easy as the no-knead bread was, I only made it once. It was still too much of a hassle, the waiting around and timing and fretting and generally having to engineer your day around the whims of a sludgy pile of flour and water.
Here in Estonia they are no experts in crusty European loafs. They prefer dark brown bread, dense and nutty, which is wonderful in its own way. They've also mastered a dark rye sourdough loaf, which is only carried in one grocery store in Tartu, that we once waited close to an hour for as the delivery was late (it's that good). But good chewy European-style white loafs? Don't exist. The word for bread, leib , refers to dark bread exclusively; a different word, sai , is used for white bread. The closest thing are these sandwich rolls that they label as ciabatta, which are crumbly and way too soft.
Elin and I have tried our hand at a number of recipes, from sandwich bread cooked in loaf pans to loose-formed round boules on a baking stone. They've been moderately successful, but a good crusty loaf takes a long time to master.
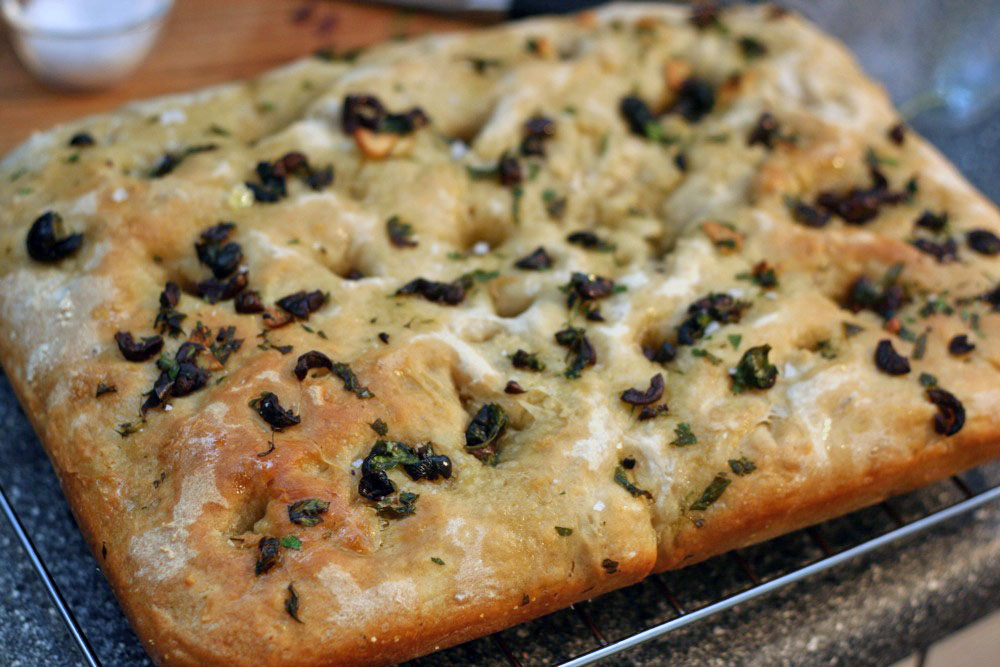
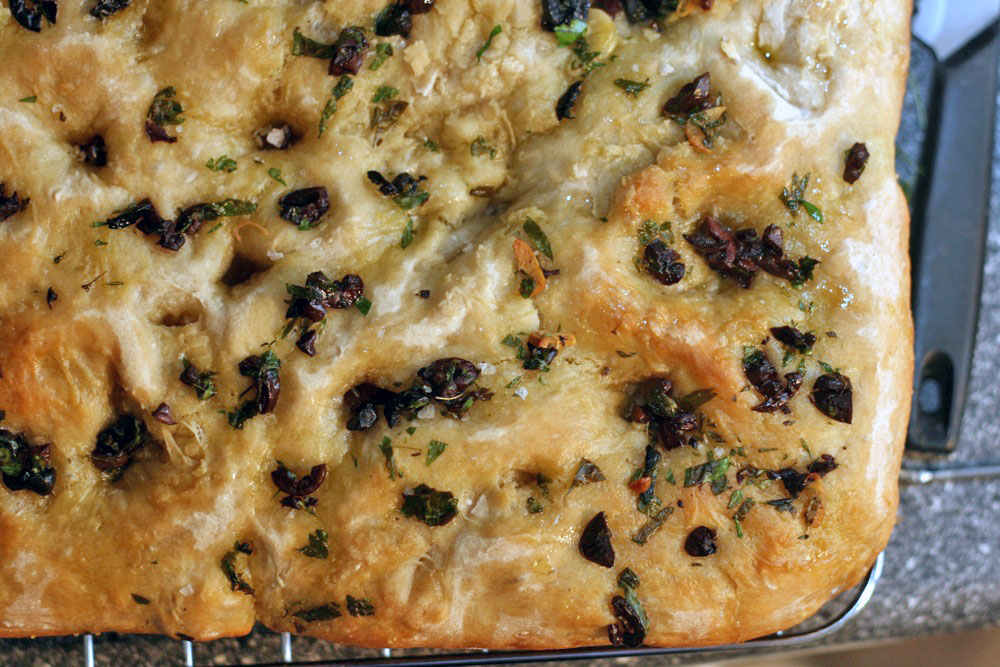
Then we came across this Nigel Slater recipe for focaccia , which is painted with a thyme garlic parsley olive oil smush, then studded with olives.
It's the easiest loaf we've made (three or four times now) and tastes incredible . It only rises for an hour or so--easy to make in an evening or weekend morning--and the result is chewy, flavorful, and delightfully bready. As Nigel explains, "I wonder if it isn't the bread to make first, even before you attempt a traditional white loaf. A batch rarely fails."
The man is right--this one's hard to mess up. So if bread making scares you like it scares me, but the lure of authenticity (and a far more inexpensive option than store-bought loafs) is irresistible, then focaccia may be the place to begin. There is absolutely no reason why anyone can't make this. And there is just nothing like having fresh bread around.
Nigel Slater's Olive and Parsley Focaccia
- 450 grams (about 1 pound) strong bread or All Purpose flour
- 1½ teaspoons salt
- 2 teaspoons yeast (7 grams)
- 13.5 ounces warm water
- cornmeal
- a good handful of green or black olives
- 3 tablespoons olive oil
- a clove of garlic
- a small bunch of flat-leaved parsley
- leaves from 4 sprigs thyme
- sea salt flakes
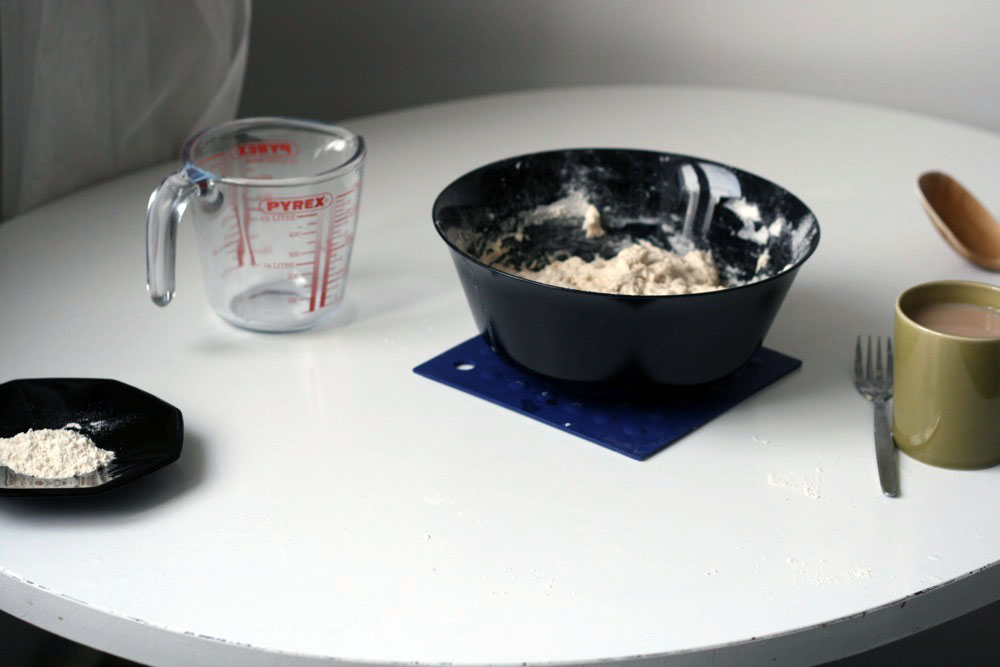
To begin: the flour amount turned out to be about 4 cups for me, but it's best to weigh flour because the density can vary, meaning measuring by volume is not the most accurate way to go. That said, the amount of flour used is going to vary, even with the same flour, from time to time. I start with 3 1/2 cups and go from there.
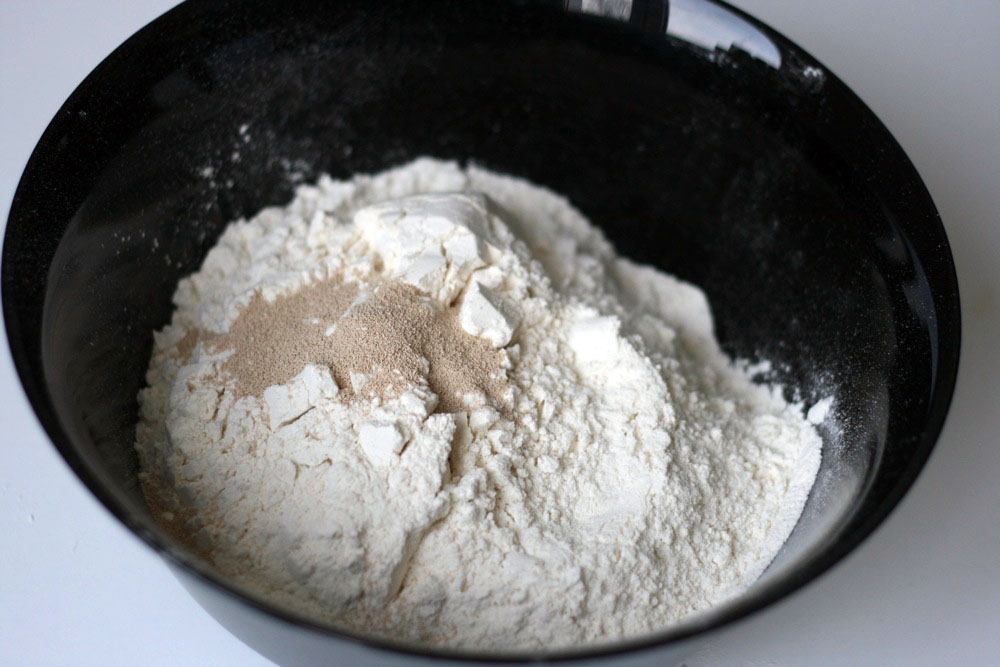
First, combine the flour, yeast, and salt in a large bowl. Stir it around with a fork to mix the ingredients well. I don't have a stand mixer (my beloved Kitchen Aid is waiting silently for me in Brooklyn), but I suppose this recipe could easily be made in one.
Next, add the water -- should be about the temperature of your skin, perhaps a little warmer. Too hot and it will kill the yeast. I added it a little at a time, incorporating the flour in until all the water was added.
Using your hands, combine the flour with the water, kneading in the bowl.
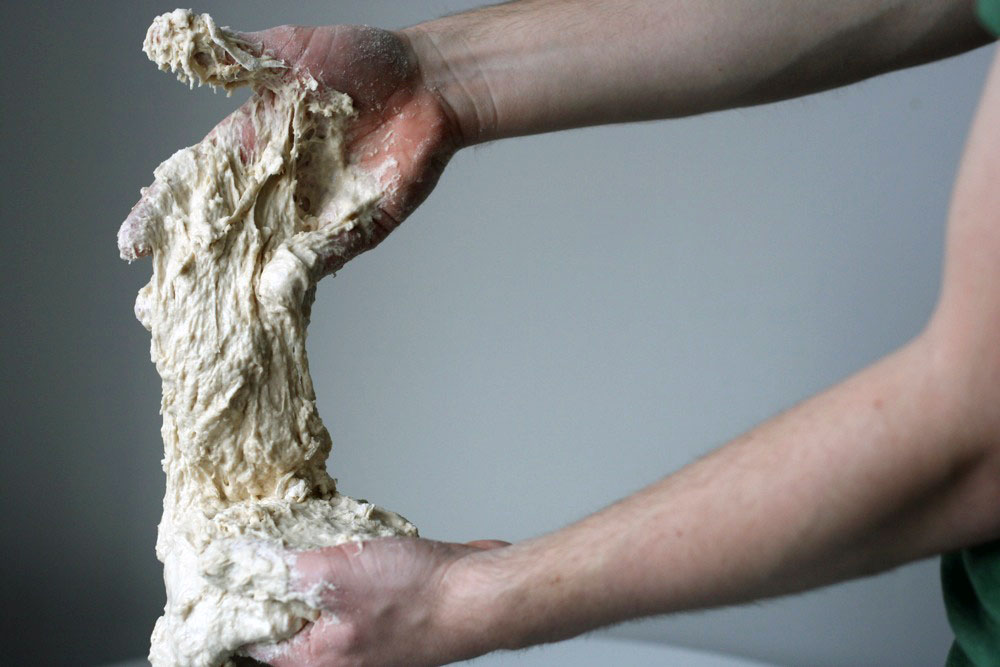
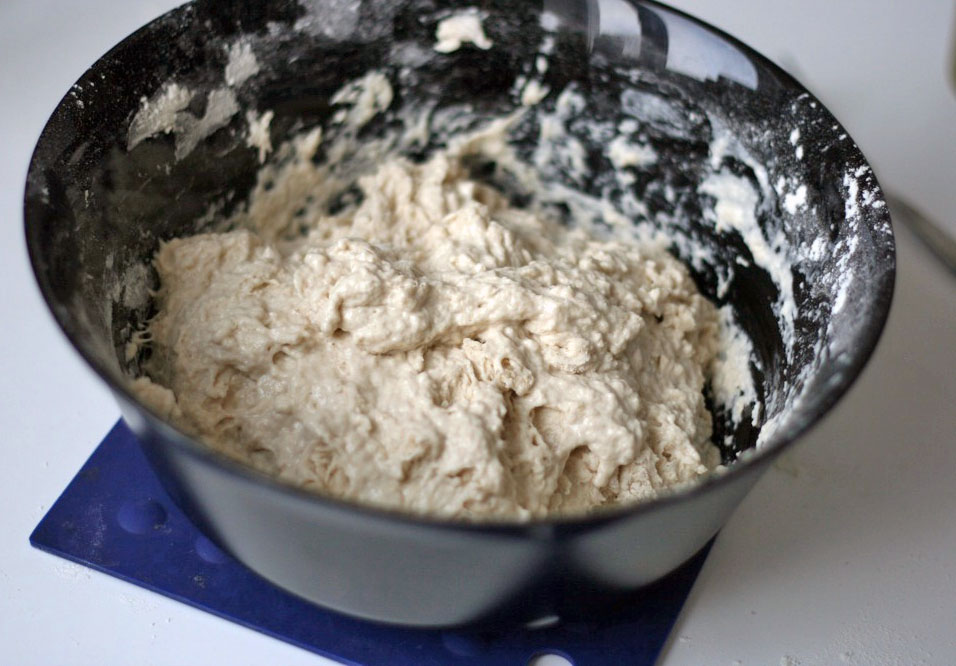
At this point, it's time to check on how wet the dough is. Mine was too wet -- the consistency should be somewhat sticky, but not excessively so. Too sticky looks like the photo of my hands up in this post's introduction:
A good test is this -- ask a friend to poke an unfloured finger into the dough (or rinse one of your own off and dry it and do the same). The dough should stick to the finger a bit, but it shouldn't be impossible to get off. You don't want it to be gloopy at all. You want to be able to work and knead the dough without the majority of it clumping between your fingers.
Scrape the dough out onto a floured surface and just bash it around for five minutes or so, pulling and stretching and folding (or using the stand mixer, just let it run with the dough hook, you lazy schmuck, who I am jealous of). I kept a little plate of flour nearby (and a warm cup of afternoon tea for rejuvenation) so that I could keep adding flour until the wetness was right -- I'd work the extra flour between my hands, into the dough that was already stuck to my palms to help remove it, then combine what had just come off my hands into the rest of the dough. Just add it little by little, because you don't want to over-flour it.
Eventually it should look about like this (notice how it's a little drier than the similar picture of the dough in the bowl above).
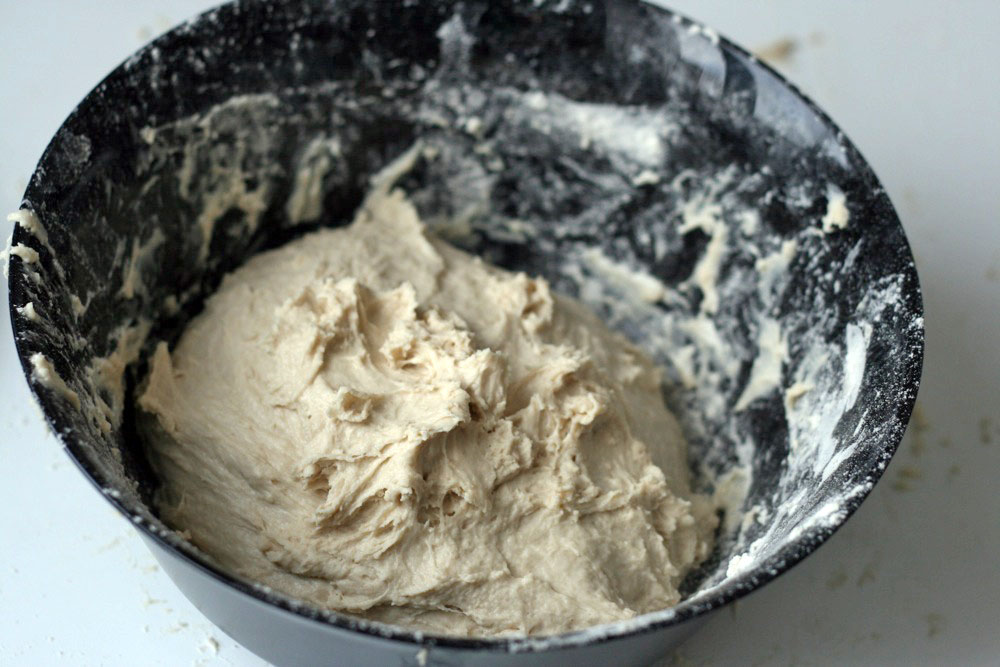
Make sure to scatter a little flour into the bowl before you put the dough back in, to avoid sticking.
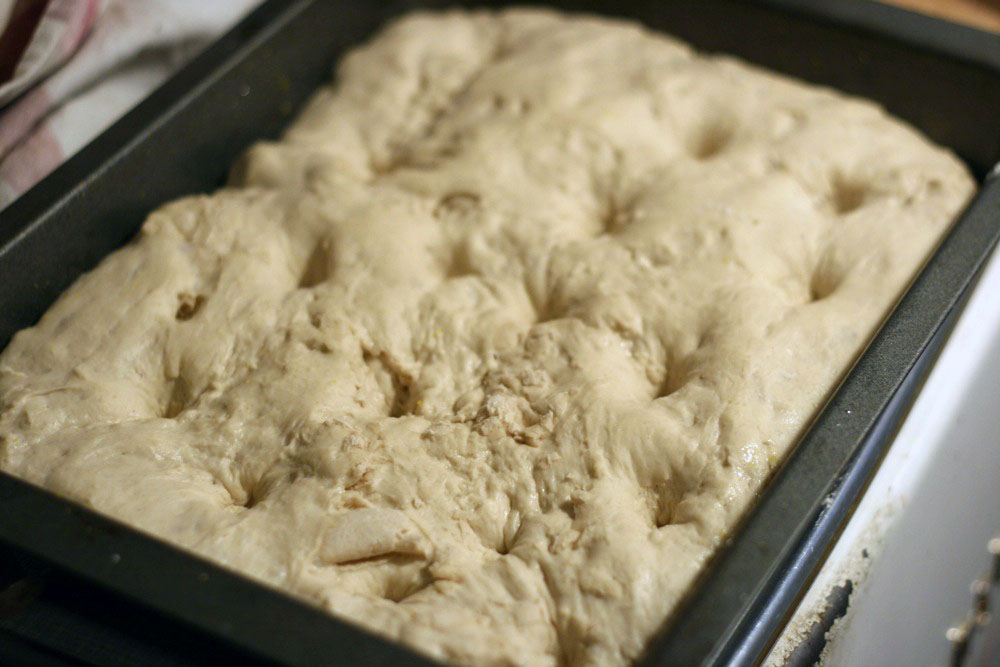
Now it's time for the rising -- when the yeast will start its work. Sprinkle a little flour on top of the dough and cover the bowl with plastic wrap or a clean dish towel, and put in a warm place to rise for as long as it takes to double in size, 30 minutes to 1 hour. On top of a radiator works well, or here I have it in front of a space heater, because it's damn cold here in Estonia.

Once it's doubled in size, find a baking pan, either round or square or rectangular. I used a 10 x 13 inch rectangle. Drizzle oil in the bottom and rub it all over the surface and up the sides to prevent any sticking. Scatter a little cornmeal also.
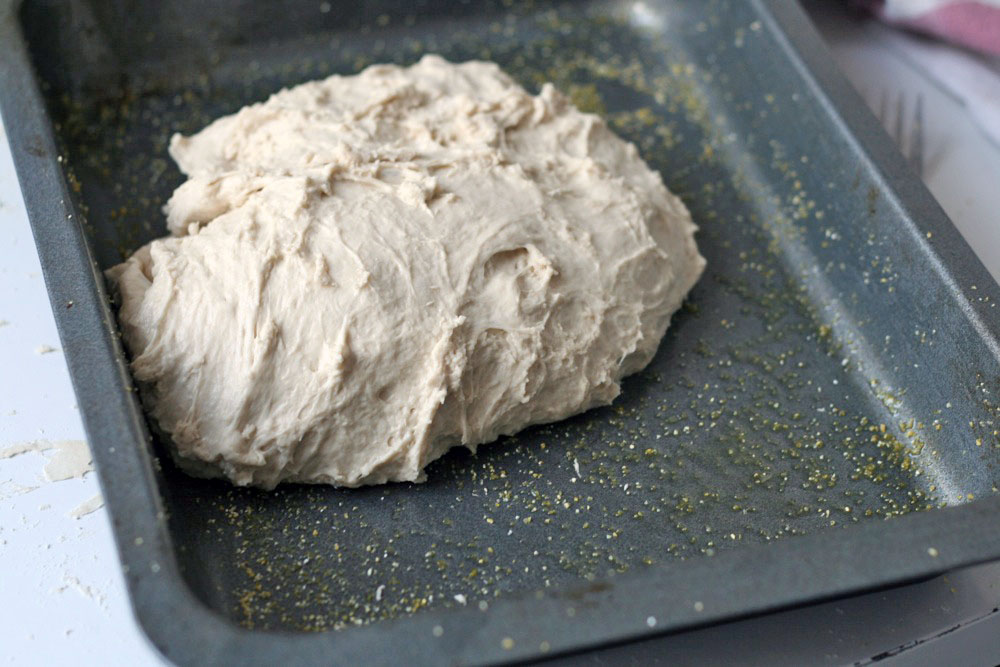
Drop the dough in (it will deflate, which is fine) and spread it vaguely around the pan. It's okay it it doesn't reach everywhere, but do your best to make it an even thickness. The dough should stretch easily.
Cover the pan again with plastic wrap or the dish towel and put it back in the warm place for another 30 minutes, until it has risen nicely. Preheat the oven to 425 F, and mix together all the topping ingredients (garlic, thyme, parsley, olives, and some oil) in a bowl. When the dough is done rising, use a floured finger to poke a bunch of holes (about 15) all over the surface.
Spoon the topping mixture all over and into some of the holes. Scatter with flaky salt.
Bake for 25-30 minutes, until the top is light golden. Remove the pan from the oven, and drizzle a little more olive oil if desired.
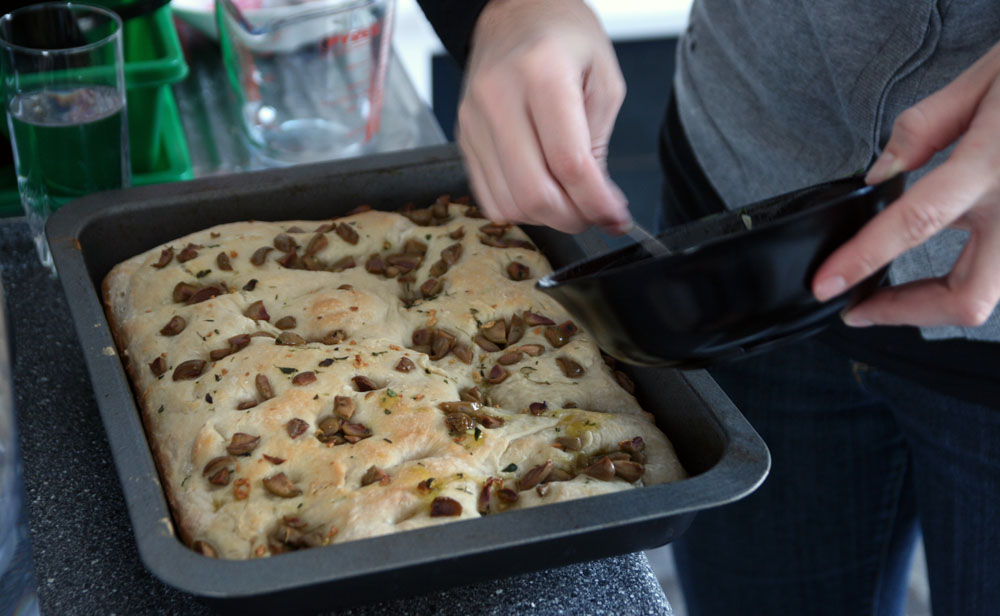
Slip it out of the pan and allow to cool for just a couple minutes. But don't let it cool too long; it's best still warm.
Food, Recipe type, Baguette, Baking, Baking, Bread, Breads, Ciabatta, Cuisine, Dough, engineer, Estonia, Estonia, Focaccia, Focaccia, Food and drink, Grains, Italian, Kneading, Mazzola Bakery, metal, Nick, Nigel Slater, Nigel Slater, oil, Olives, Sandwich, White bread, Baking
Comments:
Blog Comments powered by Disqus.