
Homemade Kimchi Contest, Part I
Blake tries to make kimchi.
Nick and I are currently in the middle of a fierce kimchi-making contest , in which we've both set off to do our own research and exploration, make a batch of the best kimchi we know how to, and submit it for a taste test. Neither of us have made kimchi before, but we both love the taste of it dearly. Tired of paying for it at the store and intoxicated by the possibility that homemade kimchi could taste even better than the commercial stuff, we challenged each other to a kimchi duel.
So Part I of the contest is my own post about what I did to make my kimchi. Nick will post next, and later this week--once the taste-test results are in--we'll finish with a report about who won.
For my methods, I turned to three major sources. Thanks to all your lovely comments on our announcement post, I ended up watching a video at Maangchi.com , and carefully reading Eat, Drink, Man's studious and learned report on the essentials to making it correctly. I also turned to Raymond Sokolov's A Canon of Vegetables , a recent gift, which I've been cooking out of a lot lately, and which serendipitously had a recipe for kimchi.
I'll admit, cooking from three sources was a little confusing. I was often left wondering exactly how much of everything I ought to be using. But with Sokolov's recipe as a backbone, culling helpful tips from my two other sources, I ended up with something on track.
My results are to follow -- and all this with the caveat that I haven't yet tasted my kimchi . Time will tell whether this recipe is the winner. But dang, it sure does smell good.
Blake's Homemade Kimchi
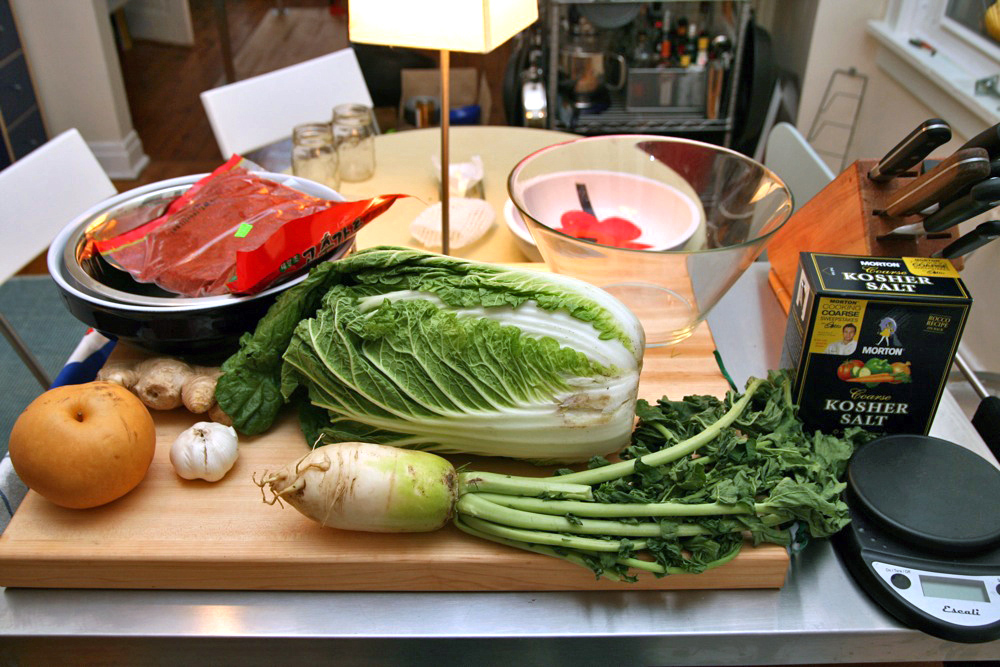
- 1 head Napa cabbage, washed
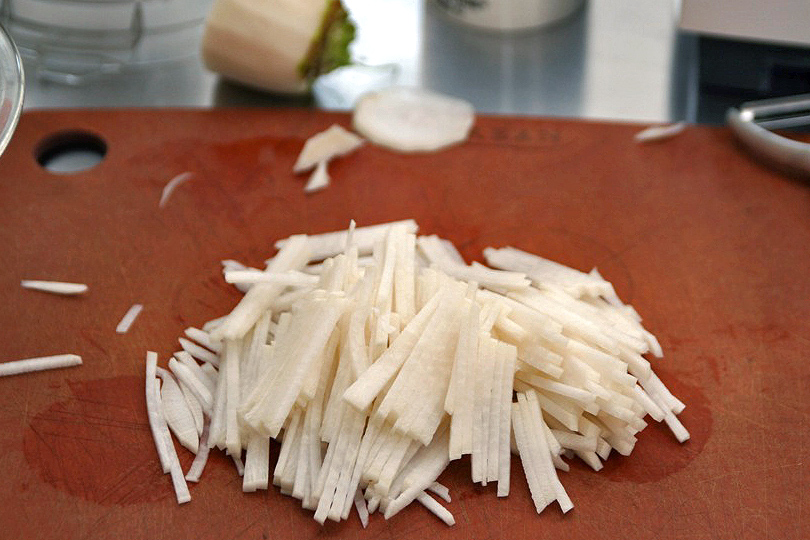
- 1 Korean radish
- 1 Asian pear
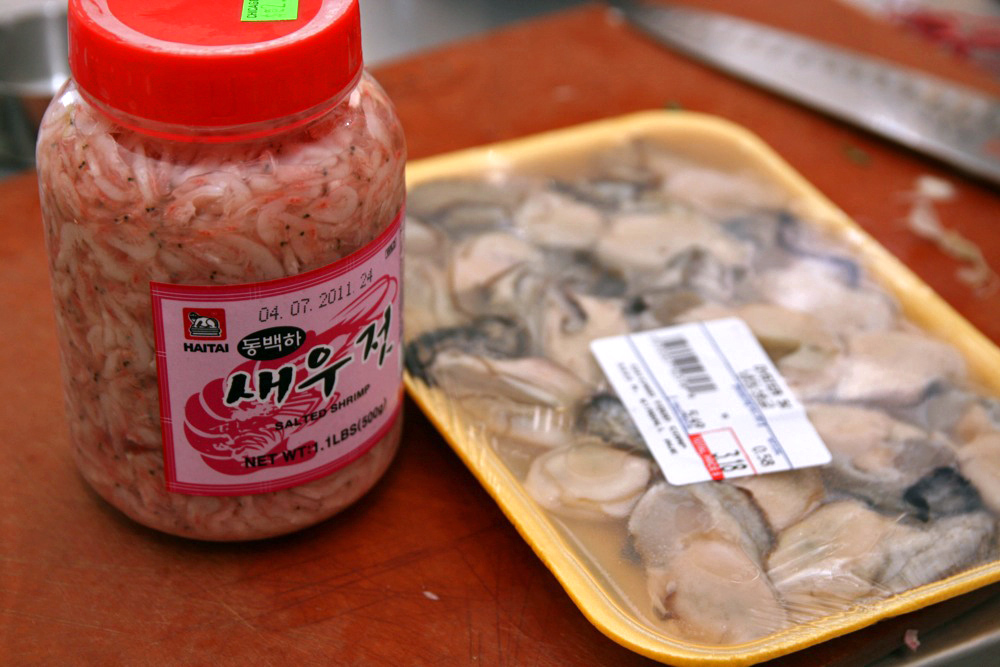
- 1/2 cup salted shrimp (from Korean markets)
- 1 head garlic
- 3 ounces ginger, peeled
- 1/2 cup Korean chili powder (Gochugaru)
- 2 bunches scallions
The first step was to prepare the cabbage. I removed the outer leaves, which would later be used to wrap the inner leaves for the fermentation, and made sure to rinse off any soil or dirt.
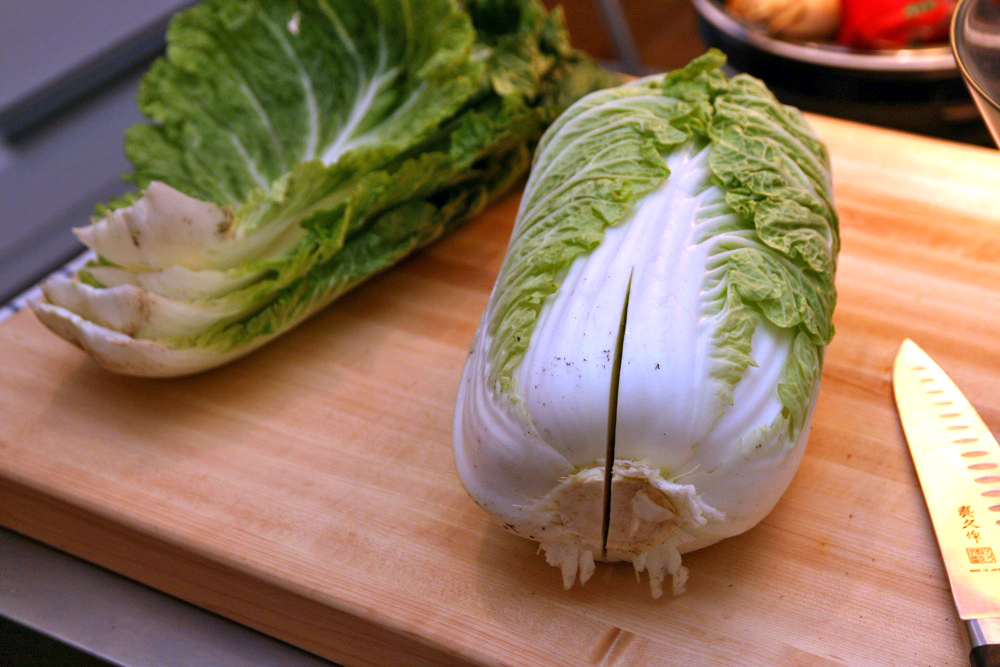
Next, I cut the cabbage from the root end about 1/3 up directly down the center. From there, you can gently pull apart the halves to split the cabbage in two: this avoids doing much damage to the inner leaves. I did the same to each half to end up with 4 quarters.
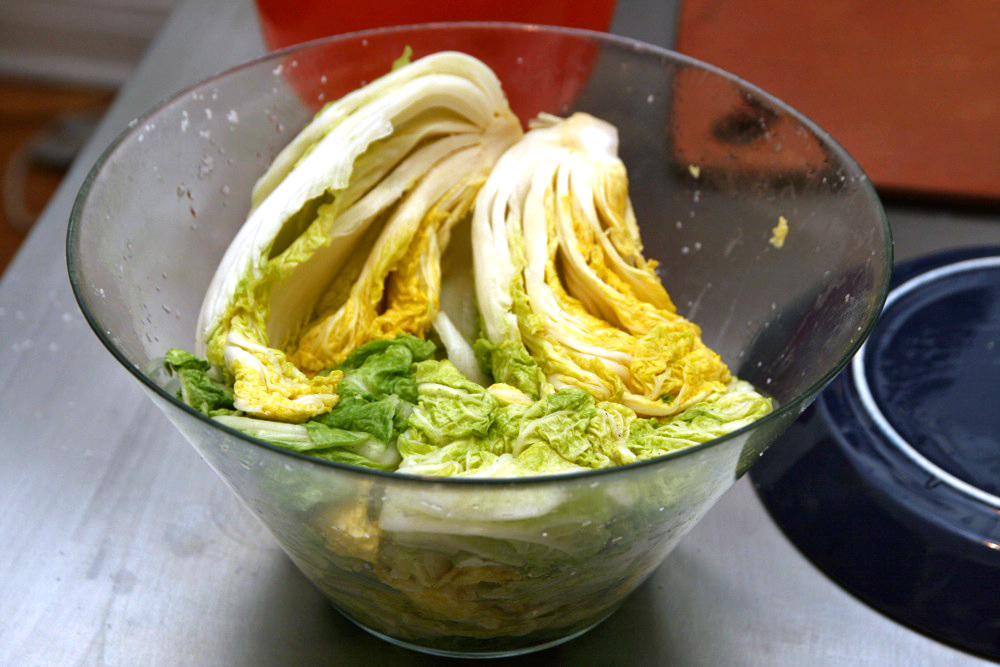
Next, I liberally salted the leaves (including the outer leaves) making sure salt was sprinkled between each layer. While some recipes called for brining the cabbage, I didn't have a receptacle large enough. With a proper fermenting crock you could pull this off, but plain salting was used in at least half the recipes I read, so it seemed perfectly fine. I left the cabbage in large bowls with a weighted plate on top for about 6 hours.

Some recipes called for 4 hours, others overnight. How do you know when it's been salted or brined long enough? The cabbage stem should no longer snap with you bend it back -- it should be totally flexible. It should lose its backbone completely. When it's done, it should be rinsed thoroughly a few times to remove the majority of the salty brine.
When the time was nearing for the cabbage to be finished, I made the paste which you paint the leaves with. The given ingredients are garlic, ginger, and Korean chili powder: you find those in every recipe. Often, though, there are other things like sugar, fish sauce, sweet rice flour, salted shrimp, onion, and in less authentic preparations, vinegar.
I weighed my options for awhile, and decided I didn't want to add anything extraneous, and to opt for natural ingredients over processed ones . This led me to avoid adding sugar and use an Asian pear instead for the sweetness, and to leave out the fish sauce in favor of the salted shrimp. I also opted against the sweet rice flour. It just seemed more authentic that way.
So into a food processor went the peeled garlic cloves, the ginger, peeled pear, and shrimp. Just a bit of water to make it into a paste, and it was ready.
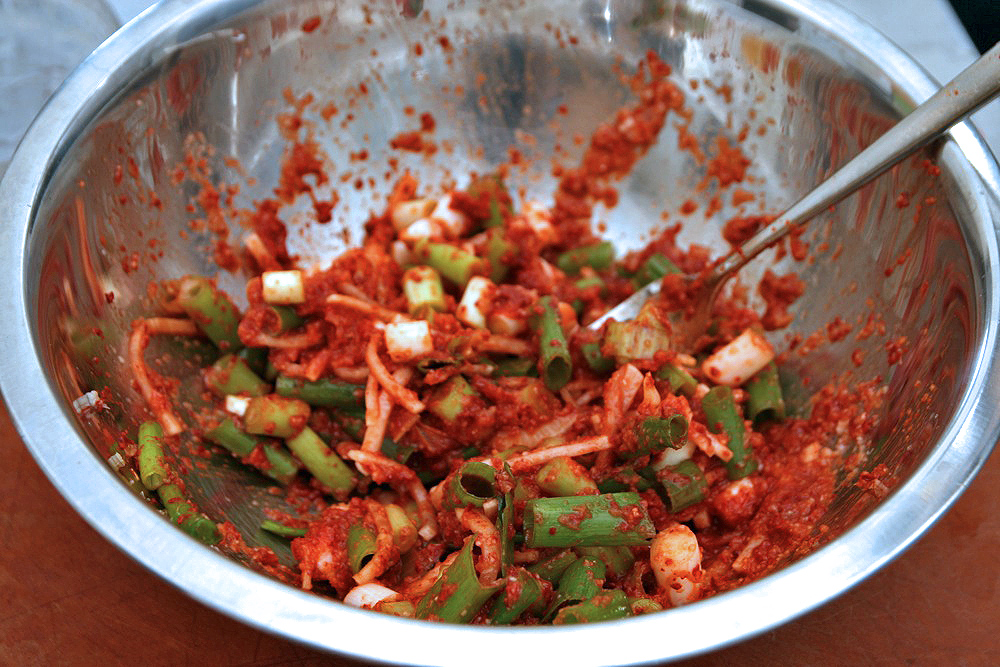
Then I mixed the chili powder with water to make another paste, and combined the two in a large bowl. 3-inch lengths of scallions were mixed into that, along with the radish which was peeled and cut into matchsticks.
(A word on the salted shrimp: this stuff is crazy pungent. In Korean market I found a fridge full of different kinds of salted shrimp, and the stench was really something. It wasn't nearly as bad at home, though. Still, I decided to put the rest in the freezer so Elin, my wife, doesn't start throwing out the contents of our fridge in search of the culprit.)
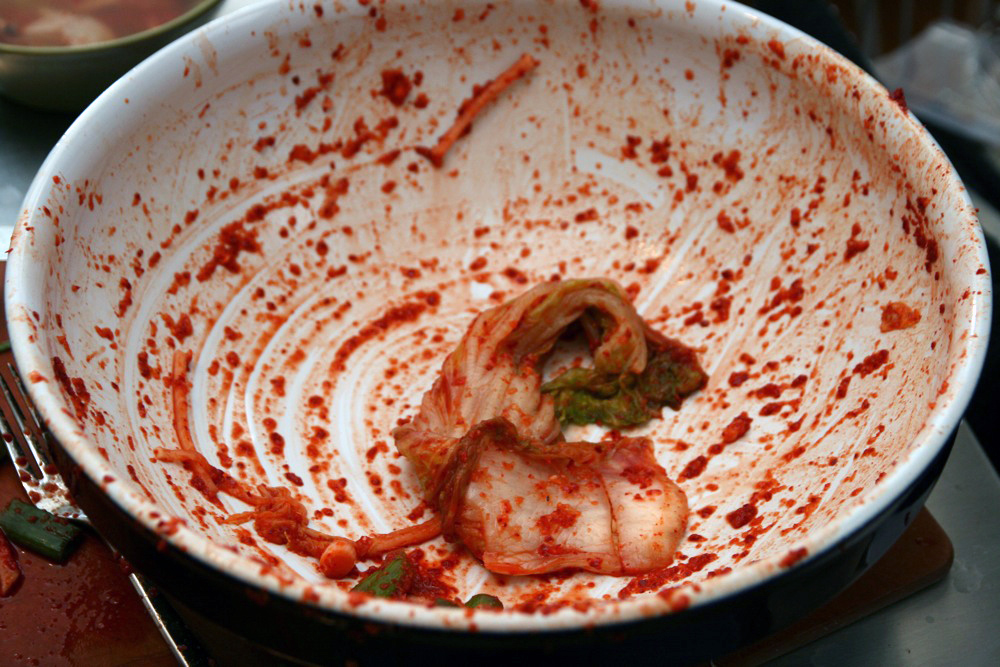
Finally, the kimchi construction was upon me. Taking a quarter of the cabbage at a time, I rubbed the pasty mixture onto the leaves, making sure both sides of each leaf was well-smeared.
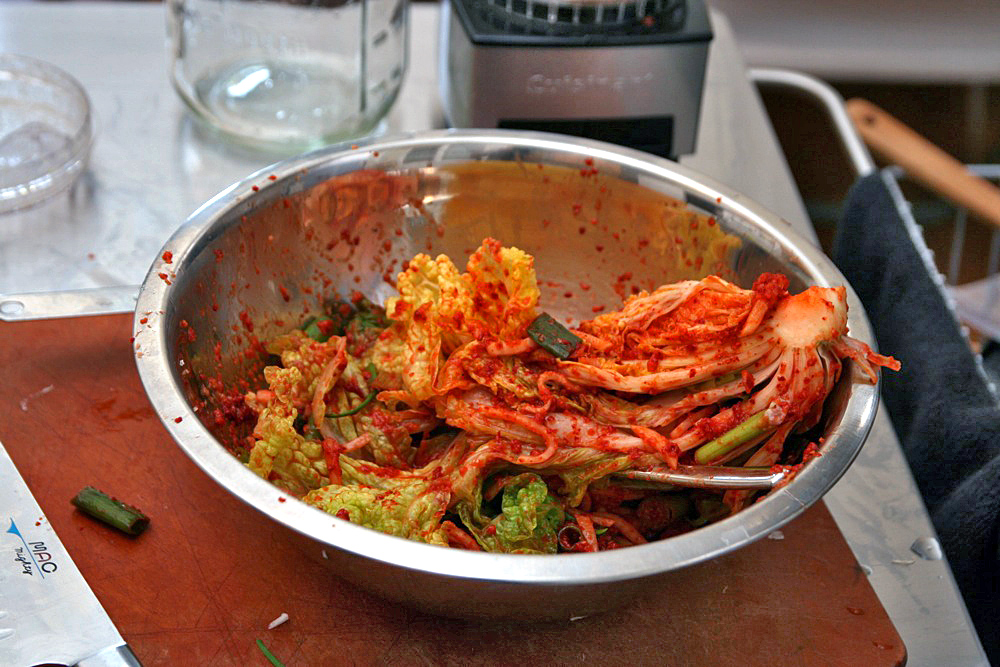
I didn't put huge amounts on, just enough to coat it nicely. This all got packed into a large mason jar, along with a little extra paste and pressed down well.
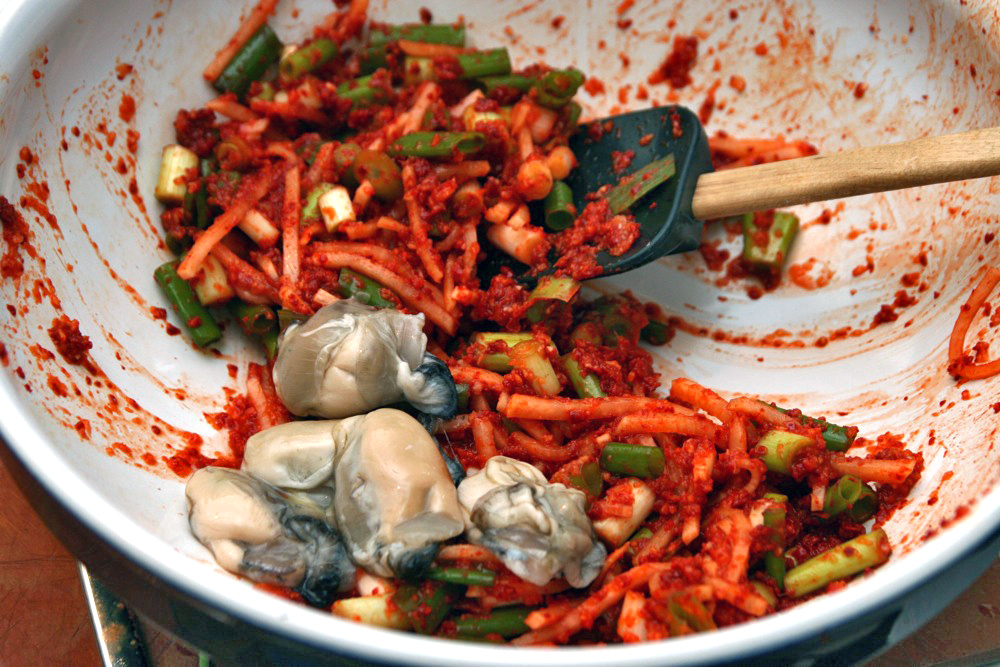
Then I pulled out my final trick: the raw oysters. This is a specialty kimchi made in coastal parts of Korea, where raw oysters are used, possibly as a fermenting agent. I wasn't planning on it, but when they had them at the market I impulsively bought a package.
The idea of raw oysters sitting around for more than a few hours is a little disconserting, especially to Elin, who keeps asking "but when do the oysters actually get cooked?" It's true: why the heck would you want fresh oysters to sit around and get funky?
Intrigued nonetheless, though not wanting to spoil my large kimchi batch, I used oysters with one quarter of the cabbage and put it in its own jar. They were rinsed in salty water then mixed into the paste.
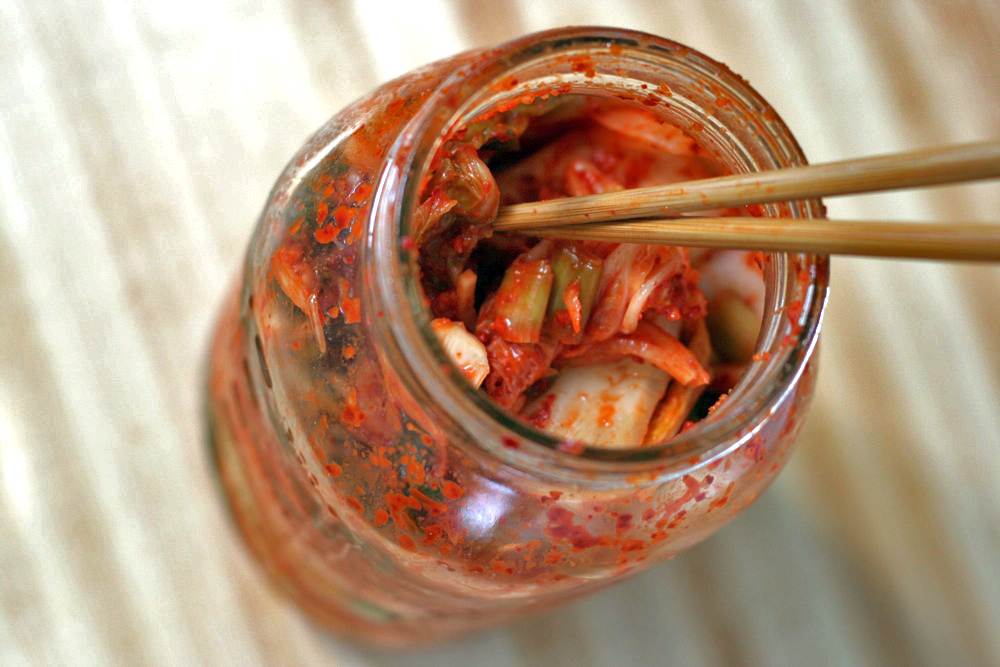
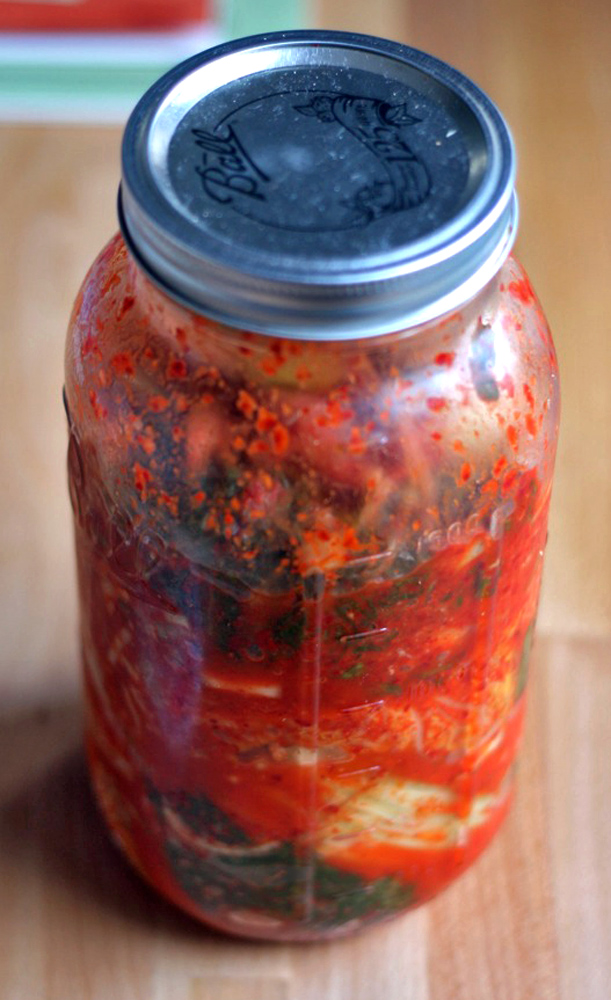
And that's all there is to it, really. All that's left to happen is the fermentation process, where the bacteria starts its work and gives the kimchi its wonderful tangy flavor. To kickstart the process, most recipes say to leave the kimchi at room temperature for a day or two. I left mine out for two, then stuck it in the fridge.
Just yesterday, I opened up the jar to check on it, and heard that reassuring sound of gas escaping , proof that the fermentation is in progress.
And there in the fridge it waits, ready to be tasted.
Comments:
Blog Comments powered by Disqus.